
Yes, this is an article solely about heads on flies. Why they matter and how to get them to look good.


Let me be honest with you: I tend to judge a fly tier's skills on his or her ability to make a nice head on a fly. Simple as that. A nice head has a major influence on the appearance of a finished fly, and the head very clearly reveals whether the tyer has a sense of proportions, has tying skills and appreciates good looking and durable flies – all important parts of creating a nice fly.
This is an article about heads made from tying thread and varnish. In other words not about built-up epoxy or LCR heads, muddler heads, heads made from other tying materials or prefabricated metal or plastic heads.
What's in a head?
Well, not much you might argue. A few wraps of thread to finish off and a knot or two to secure it after having tied in up towards dozens of materials and maybe creating a small work of art on a hook.
A fly needs to be finished, so you wrap a few turns of thread, add on a couple of half hitches or a whip finish, cut the thread and dab on some varnish.
Done deal!


Maybe, yes. That is really all it takes - if you have your tying skills in order and did all the previous steps well.
But if you didn't, the head becomes the game of covering up, the game of filling the gap or the game of squeezing in those last few securing wraps into a place with just way too little room.
Why the previous steps matter
Even the first few thread wraps can have an influence on the appearance of the head on a fly. Start in the wrong place and the proportions of your fly are screwed. Tie in the rib too far ahead before adding the body, before putting on a wing and a hackle, and there's no room for the head. Too far back, and you have bare shank that either needs to be covered or will simply remain bare.

Too thick a wing, too dense a hackle, too lousy a technique, and there will be demand for many wraps to cover the misery, leading to a head way larger than needed – and way larger than what looks good.
The bearded fly
My pet peeve number one when it comes to heads is what I refer to as “the bearded fly”. The beard is materials sticking out under or through the head wraps.
This simply ruins any fly for me, and no matter how beautiful the rest of the fly, a bunch of wing butts or a hackle stem sticking out under the head or a few loose hairs messing up the varnish is a no go. Unless the head is supposed to be fuzzy – like the wool head known from some classic salmon and wet flies – a head is supposed to be clean and smooth.
And the the solution isn't to trim off these butts or stems when the head is done and ready to varnish, but to make sure that they they have been trimmed early, before the head wrapping process, and can been fully covered with a few wraps of thread.


Aim for a small head
The outset is to aim for as small a head as possible. A small head can always be build up to the desired shape and size, while a large one can't be reduced – unless of course it was made purely from tying thread in which case you can just unwrap it to get it smaller.
In essence the head on a lot of flies can be just a few wraps and a whip finish, especially if you finish the fly with a hackle. If a wing is the last part you tie in, you will unavoidably end up with some butts that need to be covered, but even here you can help yourself to reducing the size through preparation and technique.


Look at flies such as the beautiful steelhead spey flies tied by or inspired by Syd Glasso. All these are typically pretty hefty flies on large salmon hooks with lots of materials, but still their hallmark is a very elegant head – made to that particular slender, tapered shape, not to cover anything, but to give the fly its very characteristic appearance. The outset for such a head is simply a few wraps to catch the last hackle and from there it's just thread wraps to get the desired shape.
Some flies hardly have a head – and don't need one. Most dry flies that are finalized with a hackle, just need a couple of wraps and a couple of half hitches or a three wrap whip finish to close off the fly. A head as such is not called for and excessive wraps will do more harm than good.
More thread only makes it worse
Altogether, excessive wraps are to be avoided, and wrapping sparingly is a key to controlling head size and shape. If the head on a fly is misshaped or out of control, more wraps are not likely to save it. On the contrary: more wraps will emphasize the mishaps and create a large an bulky head.
If things start acting up, consider unwinding the head wraps and see if you can save it by wrapping it again. Remove all but one or two wraps holding the last material and start over again. Flatten your thread to get the best possible coverage with the least bulk.
Once you are satisfied, you just need to tie a knot and cut the thread.


Some flies need large heads
A few patterns call for large heads or will end up with large heads as a result of the technique used. An obvious example is the Clouser Minnow where the construction and the eyes simply require quite a few wraps to get a nice head shape.
Some classic salmon flies also get almost ball shaped heads because the final wraps need to cover quite a lot of materials including a large and complex wing, hackles and maybe horns and cheeks.
Some streamer patterns require larger heads because they call for painted eyes, which need a good foundation, or they incorporate large feather cheeks like some Carrie Stevens flies or even brass cheeks like the Edson patterns. Covering such bulky materials or creating space for eyes will simply lead to a large head. But even so, the outset is a few wraps to hold the materials, and then wraps added with the sole purpose of covering materials and building up and shaping the head.
Large heads such as muddler heads or the heads on Thunder Creek flies don't count here. I'm talking about heads made from tying thread.
I don't glue
Some people use glue to finish their flies: Smear a bit of superglue on the thread and wrap a few times, let dry and cut the thread. I'm not a big fan of this method. First of all the glue tends to leave residues that whiten and are visible, secondly the glue is naturally sticky and will want to glue both your fingers, the material and the bobbin holder and whatever touches it.
The glue won't leave a nice, glossy surface either, so if that's what you want, glue isn't it.
Last but not least the superglues have a tendency the dissolve in water, so if your fly goes near water as most flies do, there's risk that the glue will loose its grip and the thread will unravel.


Tying the knot
I prefer finishing a fly with a classic whip finish. The advantage of this over any other knot – the half hitch by far being the most common alternative – is that it's smooth and doesn't add a knot as such, but simply covers the thread butt with a number of wraps that blend in with the wraps already there. One half hitch won't hold much, and a series will just be a series with the last one being equally weak. And each hitch will make a small lump. Very small, but still.
Untwist the thread by spinning the bobbin holder and flatten it to reduce bulk and make it easier to tighten the final loop.
I prefer using my hands for the whip finish, but many fly tiers are strong adversaries of the whip finisher – a tool that will help you hold and wrap the thread and in some people's eyes makes nicer whip finishes.
Your choice. I like the hand method, mostly because the tool is always at hand... literally.
I do use a half hitch tool - a smooth tapered tube - from time to time, mainly when the head space is very crowded with material such as a dense dry fly hackle. You can tie both half hitches and a proper whip finish with this tool, although not with as much control as with the whip finisher or the hands.
Cutting the thread
Now, you might think that cutting the thread is trivial, and in a way it is.
Good, sharp, pointed scissors. Snip! And you're done.
But you can actually make your heads even better by cutting the right way and in the right place.
I prefer finishing the thread either in the back or in the front of the head, meaning that the final wraps in the whip finish end up at the front or back edge of the head. The final wraps and the butt are easier to hide there.
And when you cut, make sure you get as close to the head wraps as possible, so that no thread butt sticks out.
Good scissors can cut the thread with no scissoring. Simply pull the thread tight, hold the flat inside of one scissor blade close to the head wraps and slide along the tight thread. Good scissors will cut the thread cleanly like a scalpel and leave no butt.
Alternatively cut using the very tips of the scissors while holding the thread tight. This ensures a clean cut, and the thread will kind of spring back and the butt often almost disappear.
Changing thread
Some tiers change threads before making the head. This can be done for a couple of reasons:
- Color change. If you tie with a thread that blends in with your materials, but want a different color head under a coat of clear varnish, a thread change is a way to obtain this. You can change thread before forming the head, but since this adds quite a bit of thread under the final wraps, you might also consider changing before the last material is tied in. This can hide the extra wraps and the tie-in point of the final thread under a hackle or some other bulky material.
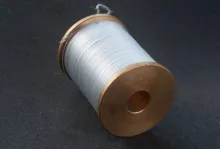
- Thread volume. If you have been tying your fly with a thin thread like a GSP thread, you might want to change to an ordinary 6/0 polyester thread or similar for building volume rather than applying vast amounts of the very thin GSP to obtain the same size.
Multi-colored heads
Sometimes you will see heads with more than one color, most commonly in the form of a black head with a colored band.
This style is a signature style for some tyers and was often used by the famous streamer tyer Carrie Stevens who added an orange band to the head of her streamers.
You do this by finishing the black thread, starting the colored thread, and while keeping the thread flat, you take a few touching wraps to create a narrow band of thread dense enough to cover the underlying color. Then you whip finish the second thread over these first wraps, keeping the band narrow, and apply clear varnish to the whole head.

Varnishing
Once the last thread has been cut, you will usually want to varnish the head. The varnish seals the thread and keeps it from unraveling, and on most flies the varnish also adds style to the fly in the form of a smooth and shiny head.
Varnishes are available in many types, and all have their pros and cons. Varnishes are often referred to as head cement by many fly tyers and manufacturers, but are not cements as such, but actual oil, resin and thinner based varnishes rather than glues or adhesives.
Most varnish is based on organic solvents like toluene, xylene, cellulose thinner or some other volatile liquid, and are inherently very dangerous to your health. They harden by drying, literally. The solvent simply evaporates and leaves a hard residue. You should always be careful and not inhale too much of this vapor. Work with open windows or create draft and don't sit too long in the fumes. If you can smell varnish, you are inhaling solvent! Simple as that.
You can get water based varnishes, but they don't dry up quite as fast, and need longer time to become as hard and durable as the solvent based ones.
Consider buying your varnish in a hardware store or paint shop. A lot of fly tying varnish is essentially just small bottles filled with good cellulose varnish for floors or metal. A small can of varnish and a handful of small glass bottles will run you very few dollars and supply you and your tying friends with varnish for years, You may already have a bottle or can of useful, clear varnish in your garage or workshop. Give it a try. It might work fine for flies.

Nail polish such as the renown Sally Hansen's Hard as Nails, used and praised by many fly tyers, is just another solvent based varnish, and being mainly acetone based it's as poisonous as the rest of them.
Alternatively you can use LCR (Light Curing Resin AKA UV Resin), which allows you to apply the liquid resin and harden it with light once the head has the shape you want. For this purpose the thin and quite fluid kind is best.
Personally I use a classic cellulose thinner based varnish for almost all my flies.
I have met tyers that stubbornly don't varnish the heads on their flies at all. Some wax maybe, or just a whip finish and presto! I don't know what magic keeps their flies together, because if I do that, my flies unravel within fairly few casts.


Clear or colored
The far majority of varnishes are clear, and most tyers finish the heads on their flies with the desired color thread and covers that with clear varnish.
But you can get colored varnish, and the best known brand is probably the classic Cellire Varnish from Veniard. This comes in four solid colors: black, red, white and yellow, but can also be had in clear. Cellire used to be favored by many tyers not least because you could get it in a thick version with higher viscosity making it easier to build up volume. These days it seems that Cellire is available in a one version only, thinner than the old, thick one.
Other colored products are Loon's water based Hard Head Fly Finish, available in 12 colors and clear, and their LCR's called UV Fly Paint available in yellow, red and orange.
An obvious source for basically any color of varnish is nail polish, which is mostly also quite thick and allows for building some volume.
Using several varnishes
You might want to combine different varnishes – or at least different thicknesses.
The best method is to start with a thin varnish that will penetrate the thread wraps and maybe seal the bases of the material – without drawing into the hairs or barbs of course! Thin doesn't mean watery, but thick enough to form a drop on a needle and not run.
When that first coat is dry, you can build up a glossy head by adding more varnish, and here the thicker versions come to their right. You can buy them thick or simply use a fresh bottle for the first coat and an older bottle for the following. The older varnish has a tendency to thicken with time, as the solvent gradually evaporates from the bottle.


Applying the varnish
I use a dubbing needle AKA a bodkin to apply varnish, and so does a majority of fly tiers. A needle offers good control, is sufficiently thin to allow access and is very easy to find – and inexpensive too.
For most flies an ordinary dubbing needle with a thickness of about a millimeter or some 0.02 inches is fine. It can be slightly blunt so that you don't poke yourself.
But finer needles can sometimes be desirable, and a normal sewing or darning needle og a suitable diameter, stuck into a piece of dowel wood is an excellent tool. Again, blunt isn't bad, and a piece of sand paper or a file can take care of that treacherous point.
Simply dip the very tip of the needle in the varnish, just touching the surface, picking up a small droplet of varnish and then apply it by touching the drop to the head on the fly. If the amount is sufficient, draw it out by using the still wet needle to distribute it.
Repeat the process if necessary, touching the bare or thinly covered spots until the head is fully covered. Never apply so much that it runs! You want many small and well controlled drops rather than one, big, saggy glob, which will run and create bulge on the underside of the head - or require a rotating fly dryer to keep it under control.
Use the needle to distribute the varnish evenly around the head using the surface tension and the natural edges and materials to control the flow. Once the varnish is a smooth and even layer, leave it to dry thoroughly before handling the fly or applying more.
Other application tools
I have seen many other methods used, and most common is the brush that comes with many varnishes – either loose or mounted in the cap. Personally I find these brushes way to coarse for my use, but if you tie large flies with broad heads, they can do the job.
You can buy empty bottles with either brushes or needles attached to the cap and transfer your varnish into them, using the built in tool for application. I prefer an ordinary bottle and a loose tool, but some people like to have it all in one place.
A couple of tying friends of mine use small varnish bottles where the cap has a special, very thin metal tube. This allows you to simply squeeze out varnish onto the head directly from the bottle. Personally I find that these bottles are a little too generous with the varnish, and they also have a tendency to clog up if you aren't careful and always remember to reinsert the thin metal rod that seals the tube.

Varnishing in batches
It makes very good sense to varnish flies in batches. So tie a handful before beginning the varnishing process, and finish several flies in one session.
I prefer holding the fly in the hand for better control, but you might want to have it in the vise for steadiness and allowing you to rest a hand on the vise while applying the varnish.
Handle the wet fly carefully, never touch the head and place it a suitable place for drying. I stick the flies in a piece of cork or hang the flies by the hook from a rod – sometimes the thread gallows on my vise.
Let the flies dry completely before applying the next layer – at least 30 minutes or an hour, and preferably to the next day if you have the time and patience.
Cleaning the needle
When the varnish has been transferred to the fly, a bit will be left on the needle. Clean this off before varnishing the next fly. If you don't, the buildup will make the needle thicker, and partly dried varnish on the needle isn't desirable since some of it sometimes rubs off on the newly varnished fly, leading to an uneven head.
One of the best and simplest tools on my tying table is a small film canister full of steel wool given to me by my friend Steve Schweitzer at least 20 years ago. A small hole in the cap allows me to simply stick in the wet or semi dry needle and let the steel wool rub off all varnish, leaving the needle clean and ready for the next round.
You can also use a cloth to remove wet varnish and a knife or an old pair of scissors to remove it if it's dried up.


Visible wraps vs. smooth
Depending on your style and mood you can build a head that completely hides the texture of the wraps. This often requires several layers of varnish unless you use some really thick stuff. It is also helped by using solidly colored varnish for the finishing layers.
You can also choose to let the wraps shine through and be visible. It doesn't make a huge difference in durability, but certainly is another style. I mostly varnish my flies two times with clear varnish, leaving the shape of the thread wraps visible.
The first varnish will partly seep into the thread and shrink a bit as it dries, but as you apply more layers, the seeping will stop and shrinking will be reduced, and you can usually build a completely smooth head with three or maybe four layers of varnish.
Alternatively you can apply a final layer of thicker varnish to get a smooth surface.
Varnish in the hook eye
Sometimes you will inevitably get varnish into the eye of the fly. Once a bit of varnish has crept towards the eye, the surface tension of the fluid will have a tendency to draw more that way, and this sometimes leads to a clogged up eye.
Remove it immediately while it's wet! Once it's dry or even just thickened a bit, removing it will most likely ruin the rest of the head.
The absolute best and easist way is using a feather. If you are tying a fly that uses hackle, you will most likely have bits of stem with some barbs left on them, and these make superior tools for removing varnish in the hook eye. Simply pass the feather stem through the eye, letting the barbs smear off and pick up the varnish. One go, and the eye will usually be left quite clean. If not, simply go a second round with a new feather.
As an alternative, you can use a needle, but the solid metal tool isn't nearly as efficient as the humble hackle.
Some tyers routinely varnish the heads on their flies in such a way that it clogs up the eye, after which they clean out the eye. I do not recommend this method, which will leave a badly defined head on the fly and remains of varnish on the ring of the eye, bound to be rubbed off once you tie it on a tippet and start fishing it - or even worse: cracking and cutting your tippet.


Hand picked for this article


- Log in to post comments
