


Tool turning
Dutch Henk Verhaar finds that producing his own tools is just as satisfying as tying flies or building rods. Follow his small course in woodturning here and learn to turn hair stackers, bodkins and other beautiful tools in exotic woods

Figure 1: A wooden hair stacker
|

Figure 2: Basic piece of wood
|
I think that one of the defining aspects of fly fishing is the relatively 'primitive' nature of this area of fishing. Disregard for a moment the proliferation of high tech rods and reels, which is a development of the last two decades only anyway. What remains is a branch of fishing in which we use simple tools (a fly rod, maybe even a split bamboo rod, a heavy line and a hand-tied imitation insect) to catch fish in a way which, depending on how strict you look, is basically the same as 150 to 400 years ago.
Another aspect is that, more than in any other branch of fishing, fly fishers, like their historic counterparts, are likely to make much of their tackle themselves. Most flyfishers will tie their own flies, many will build their own rods, some even from first principles, using split bamboo, a few may even make their own reels and lines.
Home grown
For me this 'home-grown materials and tackle' aspect is probably what makes flyfishing attractive. I've long tied my own flies, and built (or more accurately, finished) my own fly rods. While making reels and lines is I feel beyond me, there are other pieces of tackle that can quite easily, and relatively inexpensively be made at home. A couple of Danish Fly Festivals ago, I first met Paul Little, a very gifted tier of classic salmon flies, who happened to also make many of his tying tools, such as bodkins, burnishers etc.
What struck me were the beautiful wooden (and plastic—corian) tool handles that adorned many of his homemade tools, and that, apparently, were made using a wood lathe and chisels. There and then I decided that that was something that I wanted to learn too.
So I bought a small micro-lathe and some inadequate cutting tools, and discovered that there is more to turning than meets the eye. Several wasted pieces of wood and some seriously damaged chisels later (as I would later find out, this was not my fault, other than buying rubbish for tools), I realized that I would need some instruction or tuition. At which point I discovered that while woodturning, after almost becoming a forgotten craft, is currently a rather popular passtime, not much effective instruction is available.

Figure 3: First drill
|
Not a master
So I scoured the internet and found some useful hints and tips, and fortunately (although not so much for my pocket book) found some sources of high quality cutting tools (gouges, chisels and scrapers) and started buying bigger and better lathes. I've since learned a great deal, and although I'm still by no means a master turner, but I think that I can now produce some tools, such as bodkins, extended body tools, and hair stackers, that I at least am satisfied with.
A hair stacker
To show you that making e.g. a wooden hair stacker (see figure 1) is relatively simple, provided you have the right tools, I've created an illustrated tutorial. Starting material is a piece of wood (fig. 2) in this case a piece of Mexican bocote, originally intended as a pen blank.

Figure 4: Lathe drilling
|
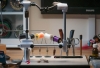
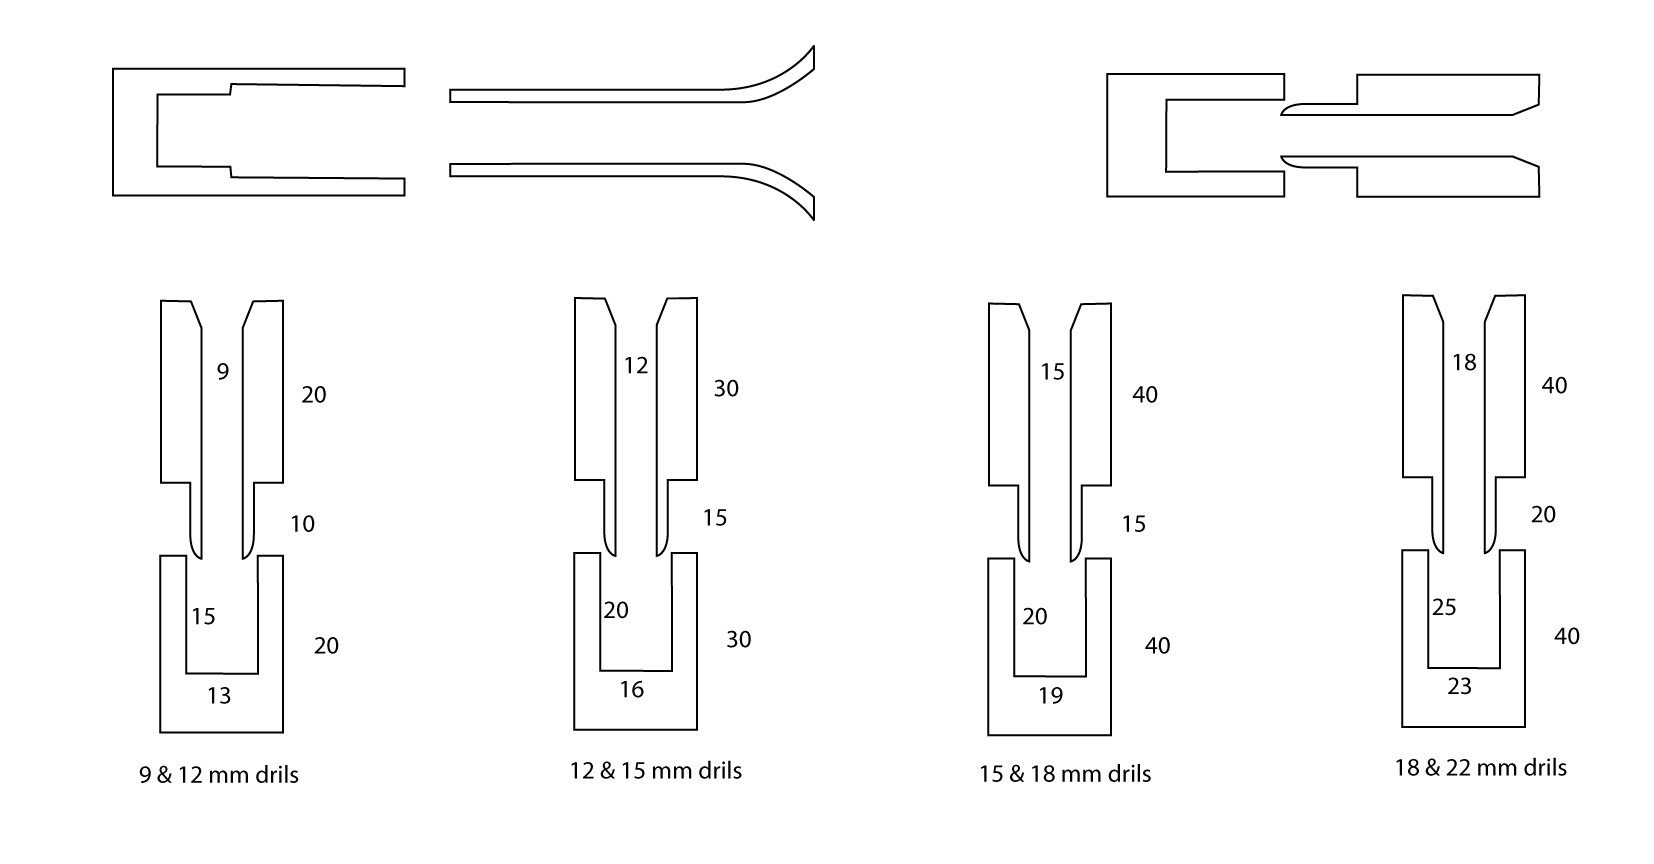
It should be long and wide enough for the stacker we're going to make (see the list of dimensions at the end). In this case we're making a small stacker with a 1 cm diameter hole, so we can actually make 2 stackers out of this piece of wood. There are two basic stacker designs, viz. with an internal step (drawing 1) and with an external step (drawing 2). The internal step design is more suited to a metal lathe workflow. The external step can easily be made by hand on a wood lathe.
A chuck
First of all we drill a hole in one end, to accommodate a screw chuck (fig 3). Drilling is done preferentially on the lathe (fig 4), as this facilitates drilling parallel to the actual rotation axis of the blank; this way the hole is always concentric with the turned outside of the stacker.

Figure 5: Screw chuck
|

Figure 6: Next hole
|

Figure 7: Rounded
|
 and insert are marked using dividers")
Figure 8: Marks
|

Figure 9: Calipers
|

Figure 10: Shaping up
|
 is now rounded and ready to be separated from the bottom (left)")
Figure 11: Rounding
|

Figure 12: 3D bit
|

Figure 13: Scraper
|

Figure 14: Skew chisel
|
Since we need to be able to do some end grain work on parts of the stacker, and therefore cannot use the tail stock to support the piece during that part of the turning sequence, we need to hold the work piece in a chuck, instead of driving it with a pronged centre as in fig 3.
I find a screw chuck the easiest to use for small pieces. After drilling the first hole, the piece, the piece of wood is reversed and screwed onto the screw chuck (fig 5). This one is originally a bottle stopper screw shuck.
Hole for the top
Next we drill the hole for the top part of the stacker (fig 6). This hole should be just deep enough to fully reach the intended lower end of the top part. Then the piece of wood is rounded using a spindle gouge (or a roughing gouge) to almost the final dimensions, and possibly smoothed with a skew chisel, if so desired (fig 7). Next the length of the upper barrel, lower barrel (base) and insert are marked using dividers (fig 8). The diameter of the insert is turned with a parting tool and calipers (fig 9 and 10), then sanded. The insert is rounded at the opening (lower) end using a beading tool or small skew, detached from the lower barrel in the process, and set aside.
A 3D bit
Next the hole in the lower barrel, that will receive the insert, is drilled using a special, so-called 3-D drill bit. The 3D bit is essentially a plunge router bit for use in a hand drill and is very well suited for making straight holes in end grain (fig 12). This hole is made slightly undersized, and then made to fit the insert using a side scraper (fig 13).
Take off small amounts and try for fit frequently. When a good fit is achieved, put the top barrel in the bottom barrel and bring the tail-stock up to the joined barrels (fig 14). Use a skew chisel to smooth the outside of the complete stacker and give it its final shape (fig 14); I usually opt for a very slight hourglass shape (fig 15).

Figure 15: Hourglass
|
Sand to at least 800 grit and use the parting tool to detach both barrels at the sizing grooves, starting with the top barrel. Finish the barrel opening by hand using the side scraper, the inner wall of the barrel using sand paper and the bottom of the hole in the lower barrel using epoxy (a thin layer of epoxy will ensure a completely smooth bottom). Treat the whole stacker (inside and out) with boiled linseed oil.

Figure 16: Finished stacker
|

Extended body bodkin
|

Extended body bodkin
|

Thread splitter needle
|
Other tools that can be made include extended body bodkins (fig 17, boxwood, and fig 18, curly koa) and thread splitter needles (fig 19, tulipwood). If you can get extirpation needles, you can also make dubbing pickers.
Required tools
- lathe
- spindle gouge
- skew chisel
- parting tool
- beading tool or small skew chisel
- small side scraper
- roughing gouge
- drill bits
- 3-D bits
- dividers and diameter gauges
- sand paper
- finishing oil
- drive centers
- screw centers
- chucks
- drill chucks
Mini lathes
There are many so-called' mini-lathes on the market. These are more than adequate for making fly tying tools. Most are produced in China, and I almost hate to say, are excellent value for money...
In fact, you'll spend far more on chisels and such than on a more than adequate lathe.
Make sure that you buy a lathe with morse tape head stock and tail stock spindles, and a common thread on the head stock, such as 1"x8tpi, 3/4"x16tpi, or M30.
I shouldn't mention brands here, but the Chinese lathe known as MC1018 and among others available under the Perform brand is excellent value for money.
Read more about why you should register.
Related content


More content from the front page


Since you got this far …
The GFF money box
… I have a small favor to ask.
Long story short
Support the Global FlyFisher through several different channels, including PayPal.
Long story longer
The Global FlyFisher has been online since the mid-90's and has been free to access for everybody since day one – and will stay free for as long as I run it.
But that doesn't mean that it's free to run.
It costs money to drive a large site like this.
See more details about what you can do to help in this blog post.
Comments
so does anyone know
so does anyone know of any plans to make a wood fly reel?
hi great page dont s
hi great page dont surpose you know of any drawings to make a fly reel .thanks steve
Henk opens eyes to a
Henk opens eyes to a wide variety of flytying tools with this project. His work is excellent and photos and text clear and concise. A great article!