


Simple Streamers
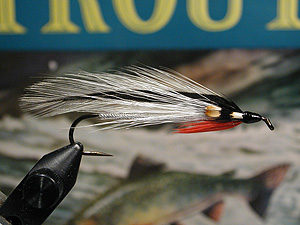
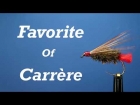
Ray Bergman is the originator of these three simple mixed wing streamers. The three were included in the updated version of Col. Bate's wonderful book "Streamer Fly Tying and Fishing". The combination of materials, the overall shape and color of the streamers really caught Bob Petti's eye.
Most fly tyers associate the name Ray Bergman with classic quill winged wet flies. It is no wonder, given the many plates of fancy wets in his magnum opus, the classic, should-be-on-everyone's-shelves, "Trout".
However, he is also the originator of three simple mixed wing streamers that are really quite attractive. The three were included in one of the wonderful photos in the updated version of Col. Bate's wonderful book "Streamer Fly Tying and Fishing". The combination of materials, the overall shape and color of the streamers really caught my eye. Of the three, I've found the Red Squirrel Gold to be particularly affective for brown trout.
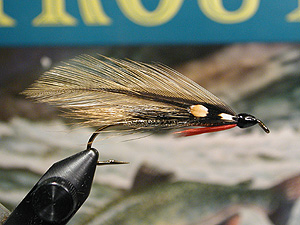
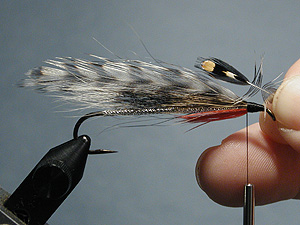
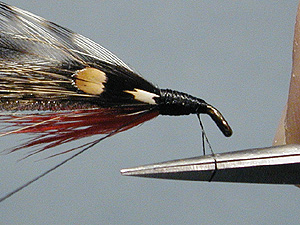
Gray Squirrel Silver Streamer

| Hook: | VMC 8xl, #4 |
| Body: | Silver embossed tinsel |
| Underwing: | Gray squirrel tail |
| Wing: | Grizzly hackle |
| Throat: | Red hackle (original has dyed red golden pheasant crest) |
| Cheek: | Jungle cock eyes |
| Head: | Black |
Red Squirrel Gold Streamer
| Hook: | Mustad 3665A, #6 |
| Body: | Gold Embossed Tinsel |
| Underwing: | Red Squirrel Tail |
| Wing: | Furnace Hackle |
| Throat: | Red hackle (original has dyed red golden pheasant crest) |
| Cheek: | Jungle cock eyes |
| Head: | Black |
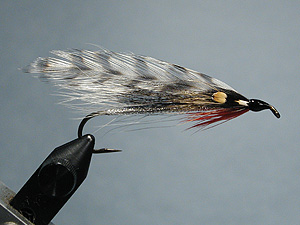
Bucktail Silver Streamer
| Hook: | VMC 8xl, #4 |
| Body: | Silver embossed tinsel |
| Underwing: | White bucktail |
| Wing: | Silver badger hackle |
| Throat: | Red hackle (original has dyed red golden pheasant crest) |
| Cheek: | Jungle cock eyes |
| Head: | Black |
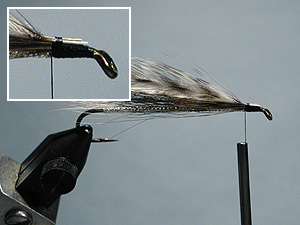
Tied here as the demonstration of the style is my take on the Colonel's "Gray Squirrel Silver".
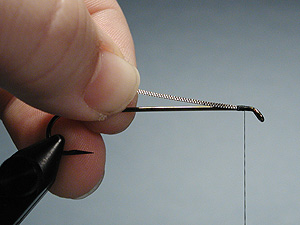
Step 1
When using metal tinsel, it is best to trim the tie-in end of the tinsel to a sharp point, to reduce the "hump" that can form with the first turn.
TYING TIP: Metal tinsel is tough on scissors. Don't use your favorites here. A good sharp pair of wire cutters may do the trick, but if not use heavy duty shears that will hold up to numerous tinsel trimmings.
Step 2:
Tie the tinsel along the side of the hook shank with smooth even turns of thread.
TYING TIP: Metal tinsel has very sharp edges, so easy goes it with thread pressure. You can cut your thread in a flash and curse yourself one time after another.
Since the tinsel will overwrap itself when tying in the body, it's not going anywhere. Maximum thread pressure is not required - just enough to hold it in place while making that first turn.
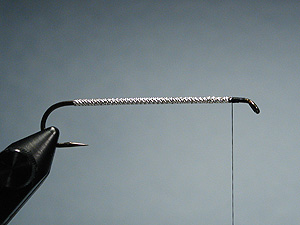
Step 3:
Wrap the tinsel down to the bend and back to the head area. For more on tying tinsel bodies, see here.
TYING TIP: If you misjudge your length of tinsel and find yourself struggling to hold on to an ever shrinking tag end, use a pair of hackle pliers to finish the job. Seems the first fly or two, I'm always misjudging the tinsel. I feel like I'm pulling a yard off the spool, yet I come up an inch short. Argh!
Step 4:
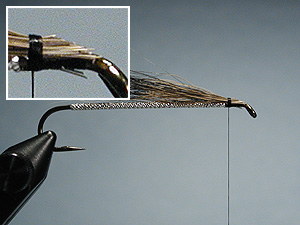
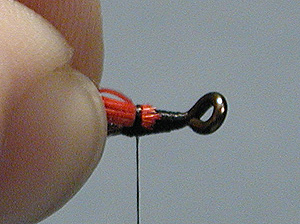
Tie the tag end of the tinsel off and wrap a smooth base under what will be the head of the fly. Not a lot of wraps - just enough to eliminate any drop-offs at the end of the tinsel body. We don't want bulk, but we don't want a bump to force the wing up.
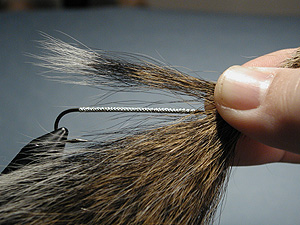
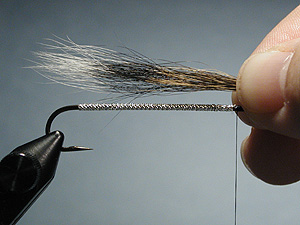
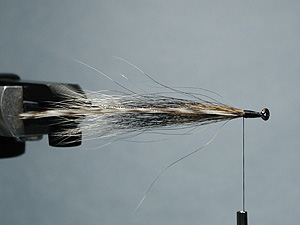
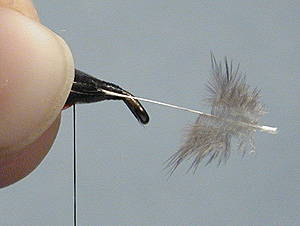
Step 5:
Grab a chunk of hair from a Gray Squirrel Tail. Remember, there is more to the wing that the squirrel, so think sparse. Use about half what you would for a full wing.
Make sure the hairs are long enough for the hook size you are using.
Step 6:
Measure the hair to length. We want the tips to go just to the back of the hook bend.
Step 7:
Using a pinch-n-loop, tie the wing down on top of the hook shank. For more on tying hair wings, see this excellent article.
TYING TIP: When you are ready to apply tension, pull *up* on the thread. This will help keep the hairs from rolling off to the far side of the hook.
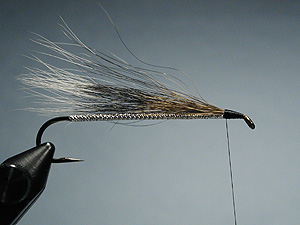
Step 8:
The finished wing is tied in. If it doesn't seem right, unwind your thread wraps and start over. Once you are happy with the wing position, hold the hair with your off hand and bind the wing down with very firm wraps of thread - maximum tension here. Squirrel tail will not flare, so you don't have to worry about it flaring up high, but it is slick and oily and can slip out of position if it is not tied in very tight. A drop or two of your favorite penetrating head cement is not a bad idea.
Step 9:
Trim the butts of the hairwing at an angle using very sharp scissors. Here again is why it is so important to tie the wing down securely in the previous steps.
TYING TIP: If you feel the wing moving out of place as you trim the hairs, just hold the wing with one hand and clip with the other. You can clean the mess of clippings afterwards. If you scissors cannot make a clean cut of the whole bunch, do it in bits. Three clean and easy clippings that do not move the wing are better than one clipping that causes things to slide around.
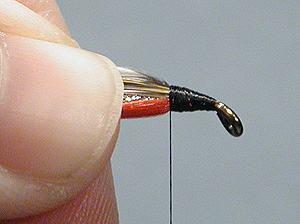
Step 10:
The clipped wing. Note the tapered butt of the wing, as well as the hairs being positioned on the top of the hook. This is how you want it to look.
Step 11:
Cover the butts of the hairs with smooth even thread wraps. We're building a base for the feathers at this point.
Step 12:
Measure your hackles to size. I want my feathers to extend just past the end of the underwing.
Step 13:
Strip the barbules off the stem below the tie in point. Stripping them not only gives you a clean tie-in point, it also has the affect of flattening the stem, so the feathers are more likely to stand on edge how we want. To ensure this - I crimp exposed stems in a pair of flat nosed pliers. Crimping the feathers at this point can also help the wing hug the top of the body.
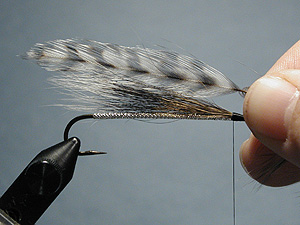
Step 14:
Tie the hackels on top of the underwing. What we're doing now is positioning the feathers, making sure they are vertical, centered with respect to the underwing, and of the proper length.
Step 15:
Once we're happy with the position of the wings, bind them down with secure wraps. Again - a tiny dab of penetrating head cement won't hurt. We want to feathers and the hair to meld together into a single wing, rather than having them appear to be distinct parts.
Step 15:
One more check to make sure the wings are centered and vertical.
Step 17:
Strip some barbs from a bright red hackle. In this case, I'm using schlappen because it has a density I like for throat hackles. Webby saddles are also good for this, but I find most neck hackles lacking in web to be good for throat applications.
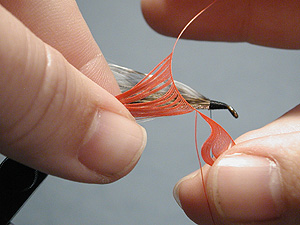
Step 18:
Measure the throat to length. It should be about a third of the body length.

Step 19:
Trim to length. For throats and beards like this, I've found it is easier to clip the feather clump before it is tied in rather than trying to clip it after the fact.
Step 20:
Tie the throat in at the back of the head wraps, working toward the hook eye as you go.
Step 21:
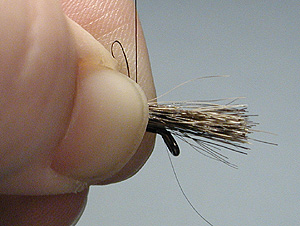
Hold the wing and throat in your off hand while you cover all exposed areas with thread wraps.
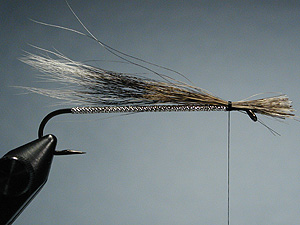
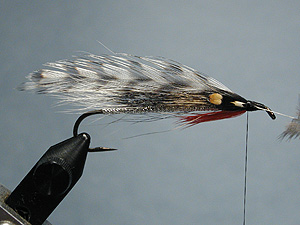
Step 22:
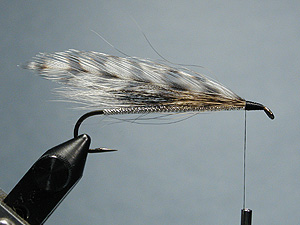
The wing and throat are complete.
Step 23:
Select a pair of jungle cock eyes for the cheeks. If you don't have real jungle cock eyes, just leave out this step, or build up a bit larger head and paint on some eyes.
TYING TIP: Read Steve Schweitzer's fine article on jungle cock eyes.
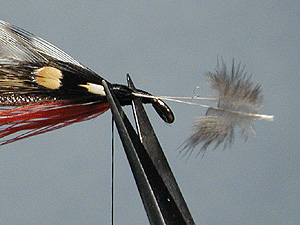
Step 24:
Measure the eye to length and pull back the bottom fluff. We want the jungle cock eyes to be less than the length of the throat. Remember - these are eyes - so keep them in proportion to the rest of the streamer and don't let them get too far from the head of the fly.
Step 25:
While wing feathers on tied on top of the hooks, the cheeks are tied on the side of the hooks. The orange and white portions of jungle cock eyes are very hard and waxy, so I avoid making thread wraps in these areas as such wraps are likely to cause splits.I like to tie in my eyes on the black feather portion just beneath the white part. Tying down some of the feather this way, instead of just bare stem, helps
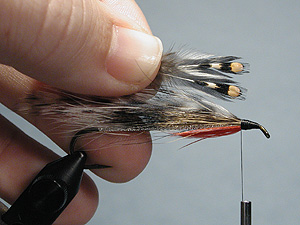
Step 26:
The cheek is canted slightly upwards, so the stem is centered along the centerline of the wing. In this case, the centerline of the wing needs to account for both the hair and the feathers, so the jungle cock is not perfectly aligned with the grizzly hackle, but pointed a bit lower.
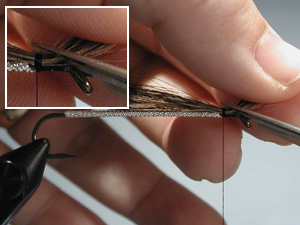
Step 27:
Careful now. This is the place to get out your sharp and fine point scissors. A clean snip will leave the cheek unmoved. If you need too, use your off hand to hold everything in place as you clip.
Step 28:
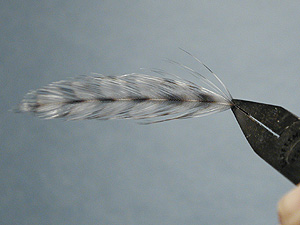
Wrap a neat head and whip finish. This could have been smoother if I took the time to unwind and flatten my thread. See this article for more on thread control.
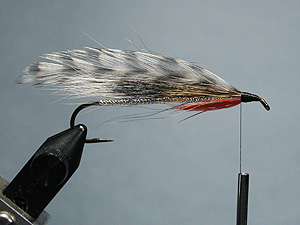
FINISHED:
Coat the head with some lacquer and ta-da!
Read more about why you should register.
Related content


More content from the front page


Since you got this far …
The GFF money box
… I have a small favor to ask.
Long story short
Support the Global FlyFisher through several different channels, including PayPal.
Long story longer
The Global FlyFisher has been online since the mid-90's and has been free to access for everybody since day one – and will stay free for as long as I run it.
But that doesn't mean that it's free to run.
It costs money to drive a large site like this.
See more details about what you can do to help in this blog post.
Comments
An excellent article
An excellent article. I tie flies and jigs all the time, but learned something from this article. An excellent 'teacher'.
nice info will go to
nice info will go to my tying bench and do this streamer. thank you and nicely explained.
Brent, >Can I hav
Brent,
>Can I have permission to copy this over to my blog...
No, you shouldn't copy anything from our site. There is no reason to repeat ad verbum what is already on the web.
But you are more than welcome to link.
Martin
Can I have permissio
Can I have permission to copy this over to my blog.....It's called "Aroostook Flyers and Tyers"
Just google it and you will be able to see my site.
An excellant tutorial my readers would love..... or I can link to here....your choice.
excellent article an
excellent article and instructions. photos assist tying instuctions. In the process of tying a couple to test locally, thanks
Simple yet deadly! T
Simple yet deadly! Thanks for the inspiration!
Been tying for almos
Been tying for almost sixty years now and I must say this is the very first article that explains ever detail of the tying procedure and the tips are excellent. I have another class starting next week and I will guarantee each student will review this page before we start on streamers. The photography is so well done I felt like I was actually watching someone tie the fly!
very good teacher.Ve
very good teacher.Very clear,Step by step.Cannot miss it.
This instruction is
This instruction is terrific: clear, simple and easy to follow with great photos of fishy-looking patterns. I especially like the tying tips. Thanks, Bob.